

Dying flowers blue with fountain pen ink for the first time is so mesmerizing.
Surprisingly, the reason fountain pen inks work so well with flowers is their antibacterial properties. It makes sense when you realize that fountain pen inks are designed to facilitate capillary action—the same mechanism a cut flower stem uses to carry water to the veins in its petals. If the water is contaminated with bacteria, the stem clogs and can't absorb moisture.
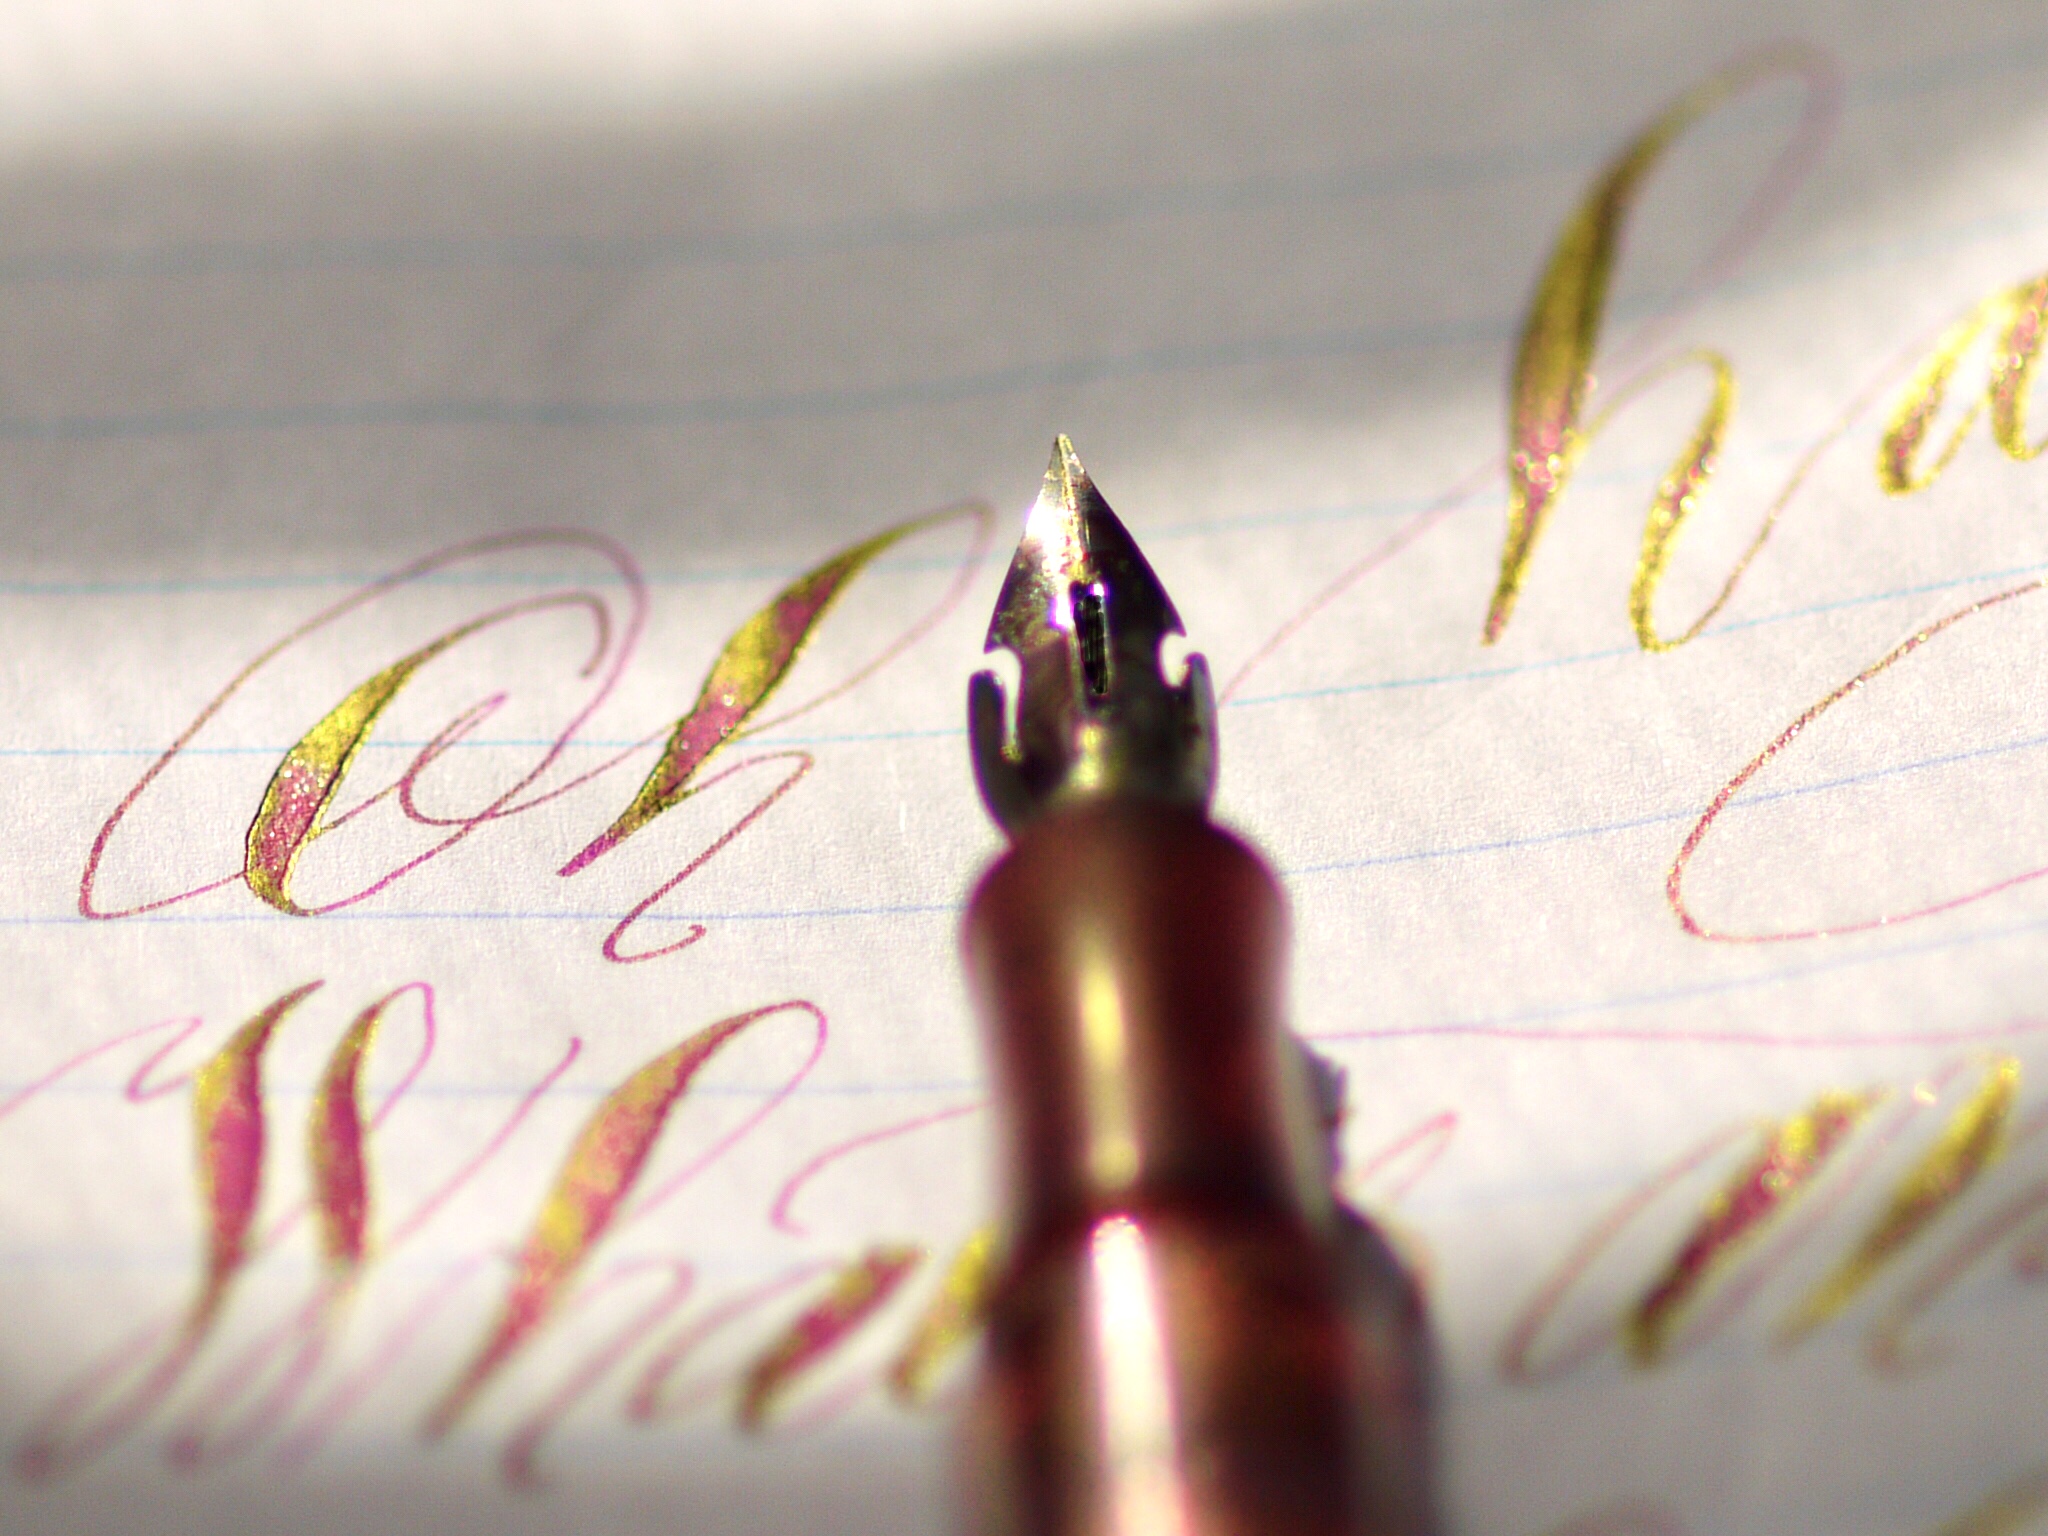
The vibrant ink creates lines or dotted stains depending on factors like the colors used and soaking time. Observe these patterns with a magnifier, and you'll see unique details. I once used 3ml of ink and watched a rose quickly drink it all up.
After dying these roses, I'm going to try and make my own dried flowers.

Several days later..
And here's the result after they're fully dried. Using the usual silica gel sold on the market typically results in mediocre, shriveled little corpses of flowers. Instead, I used a combination of extremely fine sand and pressed sheets. Look at how perfectly they turned out!


Wow! And it creates a beautiful, almost iridescent effect. Hoping this becomes a hot hobby in the handcrafting world.
~~
And now, onto the tips and tricks!
It started while testing some nib units. We found that a 5mm feeder with a G nib fits snugly in a plastic straw. This little hack made nib interchanging and the eyedropper system super easy.
Now we’ve picked new nibs because testers all love the Schmidt M a lot.

Je suis totalement d'accord.
~~~~~~~~~~~~~~~~~~~~~~~~~~~~~~~~~~~~~~~~~~~~~
A camera lens creates a really good loupe.
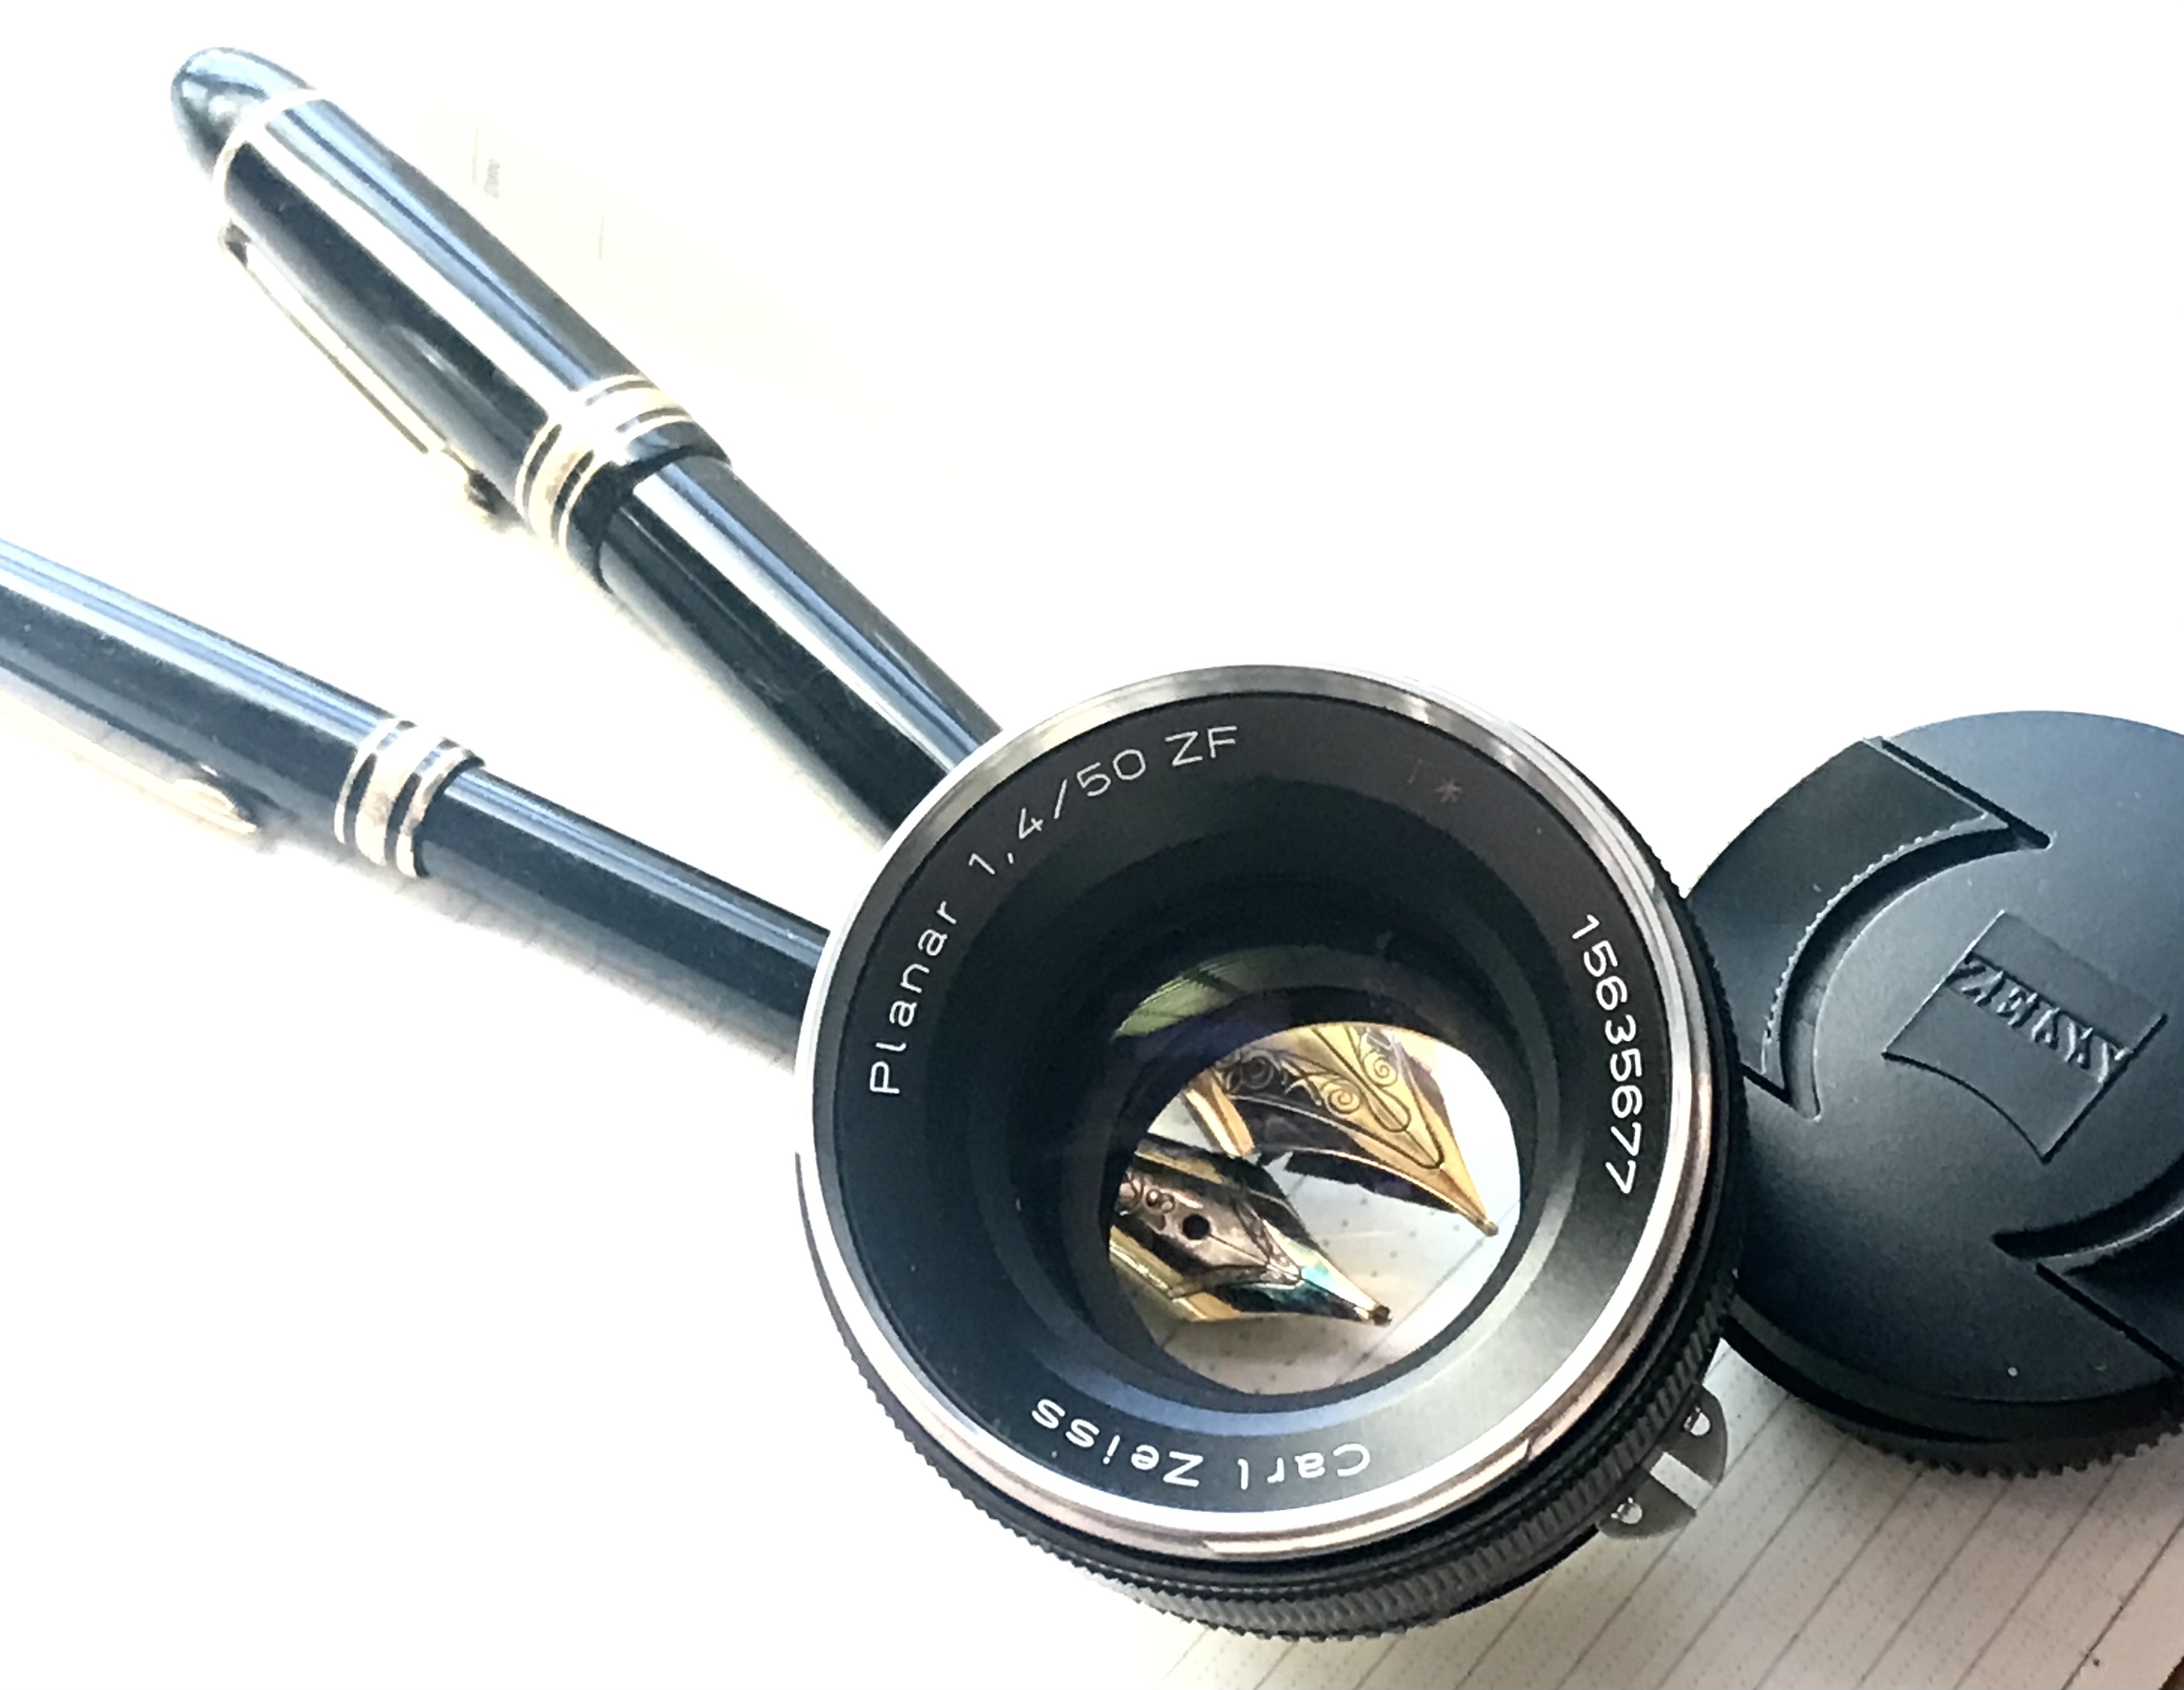
Some people recommend 10x magnification, and Pilot's craftsmen used to test details with 25x. Try viewing a nib through a fine-quality loupe— you might find it quite eye-opening. Or just use a camera lens! A 50mm lens is probably better than high-end loupes. Nibs appear clearer, more detailed, and larger when viewed directly through a camera lens rather than a viewfinder.
Just manually open the lens wide and look through from the opposite side... you'll find it much easier to examine the nib tipping. The Zeiss C Sonnar 50mm 1.5F works from both sides. This lens is the epitome of old-fashioned charm. So far, all my 50mm lenses work, except for AFs. Even the 100mm Macro Planar 2F displays quite a large window. 📸
~~~~~~~~~~~~~~~~~~~~~~~~~~~~~~~~~~~~~~~~~~~~~
G nib corrosion
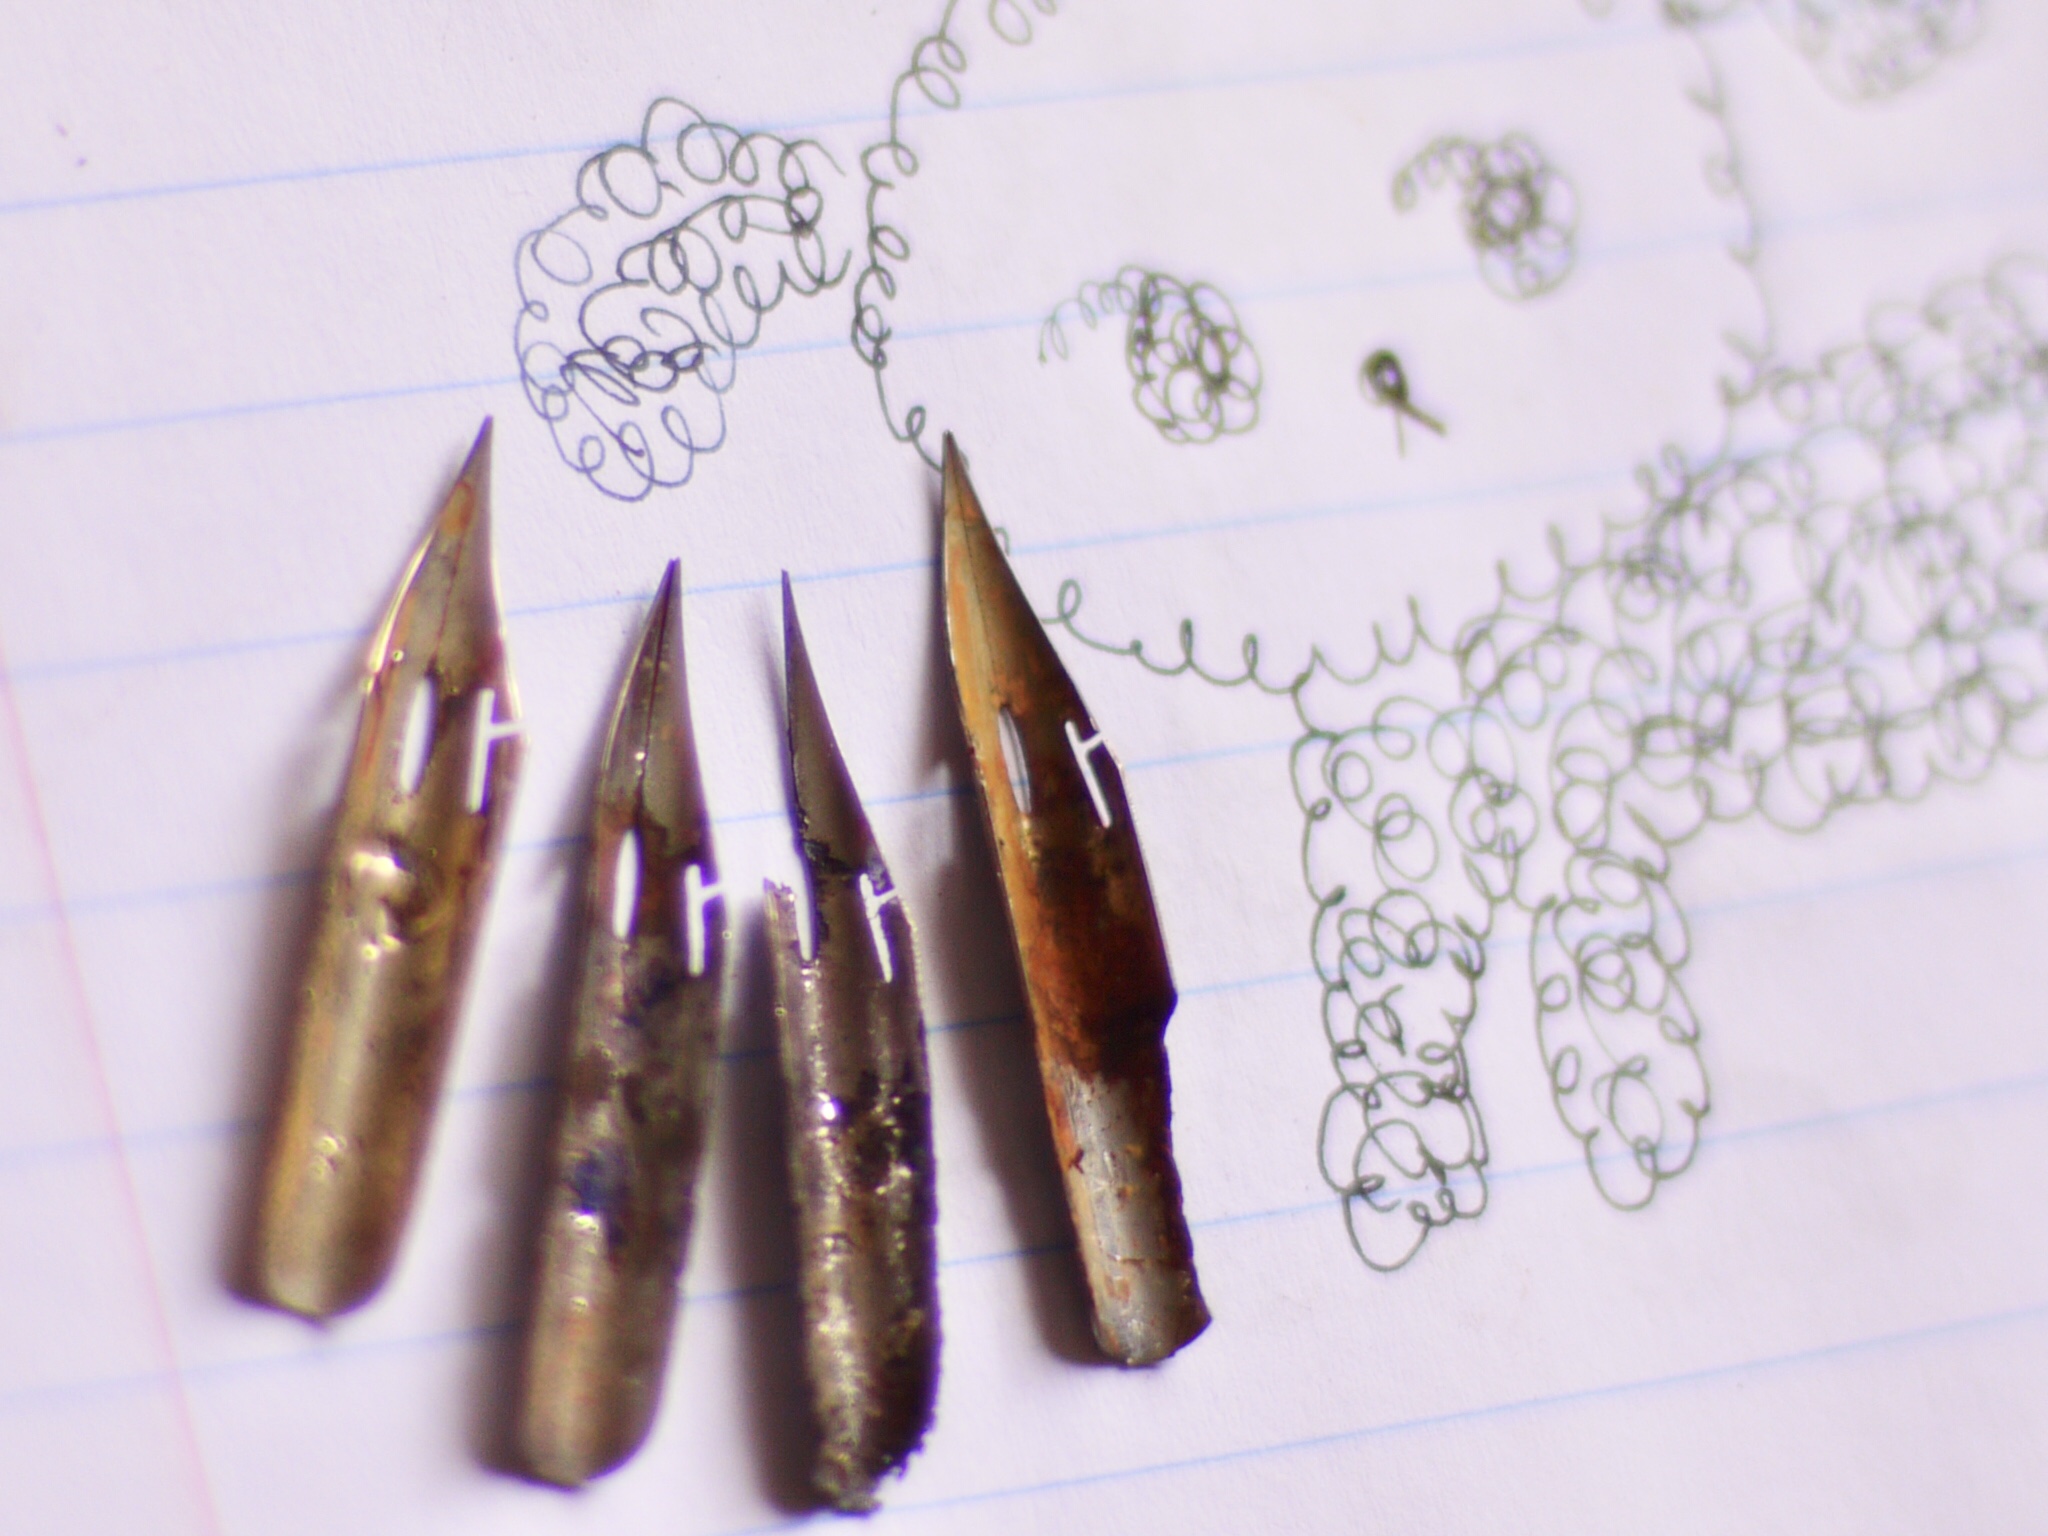
The nibs in this photo were so badly damaged due to acidic iron gall inks, omg. Surprisingly, I could still use them because the nib tip was well-aligned. A bit of light grinding is all that was needed. I’ve tried nib grinding everywhere—even once on the back of porcelain, which equals #1200 sandpaper in grit. Still, I recommend using alkaline inks with a G nib. Just toss your scratchy nibs, make life easier.
~~~~~~~~~~~~~~~~~~~~~~~~~~~~~~~~~~~~~~~~~~~~~
The urban myth of titanium
Many users know the most important part of a nib is the tipping. Fountain pen nibs are fashioned with iridium tipping, notable for its hardness, corrosion resistance, and rarity. This means they can withstand many inks, including acidic iron gall inks.
Personally, I was like, ...titanium? The first choice as nib material? Why spend more on titanium? Montblanc once released a titanium edition, but the nib itself wasn’t made of titanium.
Gold offers flexibility. Rhodium nibs are beautiful like jewelry. But compare the metal density numbers, and you'll see stainless steel is actually better.
-
Titanium: 4.43 g/cm³ (Ti-6Al-4V)
-
Stainless steel: 8.0 g/cm³ (304)
-
Rhodium: 12.4 g/cm³
-
Gold: 19.3 g/cm³
-
Iridium: 22.56 g/cm³
~~~~~~~~~~~~~~~~~~~~~~~~~~~~~~~~~~~~~~~~~~~~~
Pilot "Ponzu" BB 350 ml recipe - Blue ink with the brightest red sheen.
- Blue #1: Get a bottle (1pt/476ml) from the supermarket or dye powder online.
Pilot Blue-Black (350ml): For lubrication.
Rubato's gum: For bleed-free, no-feathering, and no-mold.*
Oxgall: For better mixing and surface tension.*
*3 and 4 are optional, but inks may lack sheen without them.
Blend 1 and 2 to your preferred ratio/color (start with 1:1).
Add distilled water if needed.
Add 3 if needed, and allow a few hours/days for the ingredients to meld. Add 4 as necessary.
~~~~~~~~~~~~~~~~~~~~~~~~~~~~~~~~~~~~~~~~~~~~~
Pilot ink proliferation!
For green ink, blend Yellow #6 (FCF, liquid or powder, used as food coloring) and Pilot BB 350ml ink. I suggest blending Iroshizuku’s Hotarubi or Chikurin instead of #6, and add PearlEx gold to create a well-behaved version of Emerald of Chivor, Waterman Mysterious Blue, or Parker Penman Sapphire. Sometimes Yellow #6 behaves poorly. Dyes each have their own characteristics.
The color combinations can produce greenish blues like denim, indigo, and more. You can extend your ink variations by blending them with distilled water.
Base: Pilot BB 350ml
Blends: Blue #1, Yellow #6, or Pilot Hotarubi.
Ink names: Cerulean, Cobalt, Persian, Denim, Teal, Turquoise, Kelly, Forest.
Orange, red, pink, purple, and other colors will also work.
Cost?
-
Pilot: $27
-
Blue #1: $3 per pint bottle or $6 per 1/2 gallon
-
Distilled water: $1
-
Total: ~3-5 cents per ml (1000ml or more).
-
30ml ink: ~$1, 50ml ink: $1.5–2.5... roughly.
Save the sheen
Pure dye creates sheen, especially Blue #1, which has an amazing red sheen and is easy to purchase in the US. But when concocted in a kitchen (not a lab setting), the sheen often dies. Your have to be a good scientist if you love those sheeny inks ✨✨✨.
- Rinse jars and bottles with distilled water.
- Avoid glycol, other emulsifiers if possible. Some food colors contain glycol, some don't.
- Use excellent graded dyes.
~~~~~~~~~~~~~~~~~~~~~~~~~~~~~~~~~~~~~~~~~~~~~
If you want to see an ink's sheen
Use blank printing paper or the paper inside Altoids tins. The front side shows sheen, while the back shows color. Also, try black paper—yes, it works! The ink colors disappear, and only the sheen remains due to light reflection and absorption on the black surface.
~~~~~~~~~~~~~~~~~~~~~~~~~~~~~~~~~~~~~~~~~~~~~
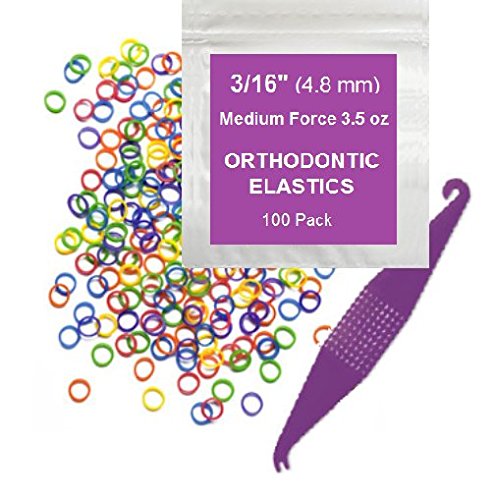
Lots of O-rings
We use silicone tubes for our pens. If you’d like to use an O-ring on the nib section, cut the tube into ~1mm sections (or try 0.5mm). Installing O-rings or silicone tubes is easy with pliers. 🛠💍 Orthopedic rubber bands are available pretty much everywhere online.
Putty & Blue pumpkin nib
I use putty to stick things together. I installed the Blue Pumpkin and steno nib with a feeder using a tiny, half-rice-grain-sized piece of putty behind the nib’s round pumpkin-shaped part. Ink stays there and flows through the tines. It writes wonderfully and flexibly. The only issue is the soft material, as it may cause a tine to become displaced. Limiting pressure on the nib (up to 3/4 of its max width) may be the key. 🎃
~~~~~~~~~~~~~~~~~~~~~~~~~~~~~~~~~~~~~~~~~~~~~
Analog nibs are far from dead
At IAMPETH in La Quinta, CA 2008 I shared the Zebra G to calligraphers. Back then, Nikko G only, and many thought Zebra was the same or simply “worse.” The real issue? A heavy oil coating. Nowadays everyone uses Zebra, we love the flex. But Nikko also has its merits.
Only two nib factories are still operating in Japan. The Nikko brand has been transferred and is produced by Tachikawa.
The Zebra G Titanium is discontinued 😢 but the chrome coated version lives on and many top mangaka (including the creator of Dandadan) still swear by it. The late Akira Toriyama (Dragon Ball) loved the Zebra G too. Even though 90% of manga artists now work digitally, many still draw characters with G nibs or maru nibs. Demon Slayer was created with analog nibs, and readers loved the expressive hand-drawn feel. These artists are hit makers!